 (Luxembourg's work)
Another photographer whom I researched who inspired me was Irving Penn. Irving influenced me when I was focusing on the topic of 'low key lighting', below is an example of my work, and Penn's. Penn's use of lighting influenced me, and challenged me to try different aspects of lighting in my photographs, including both high and low key lighting. In the image below both mine and Penn's work highlight the use of low key lighting.
 (Penn's work)
 (my work)
I have learned a variety of techniques through out this unit which have all contributed to my photographic skills. I have understood how changing my shutter speed will affect the focus on the image, and how changing my aperture will allow me to create either a wide or narrow depth of field, as shown below:
 This image demonstrates how I now understand how changing the shutter speed can affect the focus of an image, as you can see, the individual is in focus, but the umbrella is blurred.
  This is my image and it shows a narrow depth of field, this was photographed on a low aperture.
  This is my image, and it shows a wide depth of field, this was photographed on a high aperture.
 During this unit I have also learned how lighting in the studio can affect my images, and possibly result in my subjects being overexposed, or too dark. I have learned over the year how to control this better, and how equipment such as snoots, and honeycombs can help vary my lighting, allowing me to control the direction, and width of the beam of light. Furthermore, I learned how to set up the studio, during my topic of 'low key lighting'.

 These two images are examples from early on in the year, when I hadn't perfected my lighting techniques, I had the reflector dish too close, and this resulted in the right hand side of the face being over exposed.
Whereas, this image is not overexposed at all, I had got the lighting correct here, as all of the face is in focus. Moreover, the image is not too dark, or too overexposed, it's just right.
I believe the way in which I photograph has dramatically improved over this unit, as shown in the images below.
 I photographed this image when we were focusing on the formal element 'shape.' I was literally focusing on obtaining images of various, interesting shapes; therefore at this point I was not thinking about shadowing, angles, lighting... I believe this image is very weak as it's merely of a wooden wall corner. I was also using a camera which wasn't my own, but the colleges, therefore I'd never used this before, and I did not yet feel comfortable adjusting the camera settings. I don't believe this image really portrays shape to the best of it's ability.
Through-out this unit I have varied my editing techniques through both computer experiments, and physical experiments, in order to try and achieve the best effect/ outcome for my photograph. I extremely enjoyed editing my images, as on the computer you can essentially change your image to anything you want it to be. In addition, through the use of physical experiments it allowed me to be more hands-on and edit my images using various techniques, like drawing on them, scratching them, screwing them up... I would then scan my physical experiments onto the computer.
Below are some examples of both my computer, and physical experiments:
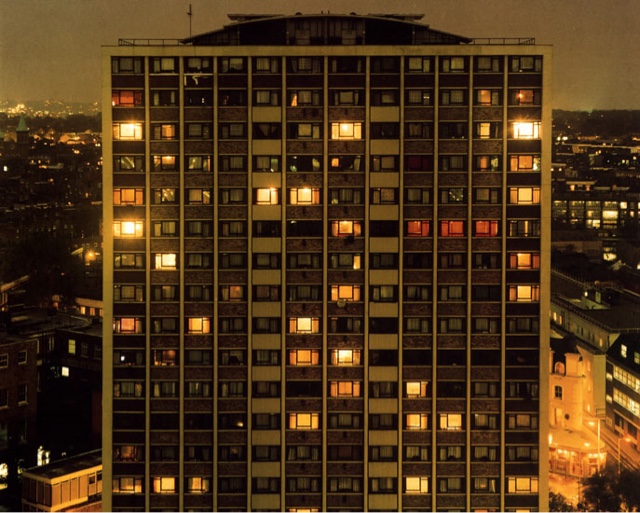
 I photographed this image when we went on a trip to London, it features as part of my photo documentary. I edited this image using the selective colour technique; to do this I used the magic wand tool to select all parts of the image I wanted in colour, once I was content with what I selected I then clicked 'select', 'inverse' which then selected all other parts of the image. Next, I then edited these into black and white. I like the outcome as the dark, royal blue stands out from the grey, and black of the background.
  I photographed this image as part of my portraiture topic. I then edited this image physically. I did this by printing it out, and then using the ends of scissors to scratch away the ink from the image, leaving white scratch marks. The outcome of this image is effective as it adds to the atmosphere of the photograph, by making it appear sinister, due to the fact it appears as though the individual's eyes are gone.
I believe that over this unit, we haven't been able to work freely, due to us focusing on specific elements and how to show them alone in our images. I'm hoping that in our next component we will be given more freedom, allowing me to develop along my own preference of photography, resulting in me developing more as a photographer as a whole. Although, I do believe that when focusing on the elements, my work elicits a form of compositional photography as I often guided the viewer's eye towards the important elements of my work (colour/shape/line/tone...) My work was not abstract at all, due to the fact our images had to portray certain elements, hopefully in our next unit I could perhaps try a more abstract route when taking my photographs too.
There were a variety of areas in my work where success, and failure came. I enjoyed shooting 'documentary photography' best as this area allowed me to focus on whatever topic I liked, and photograph pictures around this- I gained more freedom in this topic. However, I feel like my weaknesses came when focusing on the formal elements, as these were more structured lessons, with lower freedom allowance, due to us focusing on specific elements. In particular, I found both tone, and form particularly hard to photograph, this resulted in my pictures in these elements being the weakest.
Below are some examples:
 This image I photographed during our trip to London, when I was focusing on documentary photography. I like this image as the dull, and dirty bricks contrast the colours of the London underground sign, the light, and the advertisement. The London underground is a trademark of London, therefore I had to capture this somehow in my documentary. I didn't want to stereotypical photograph just the sign, so I then decided to capture the platform as a whole. I believe my camera settings are perfect here, as the lighting is just right, as I have really captured the texture of the bricks themselves. Additionally, my aperture works well, as it's allowed me to obtain a wide depth of field.
 I photographed this image as an example of 'tone', I believe this image is extremely weak as it doesn't show its clear purpose. Although there are light and dark areas, it's not a photograph of an interesting scene/object, it's merely a photograph of a cluttered windowsill. The only part of the image I like is the blinds, as the light, and dark colours work effectively here in order to highlight tone.
No comments:
Post a Comment