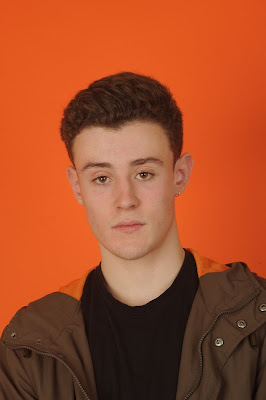
I used the vignette effect on the image, you cannot see much of a difference as the image was dark originally. If this image was on a white background you would see the vignette better. The image on the left is edited, whereas the image on the right is the original image. I like hope the vignette draws your eye into the face although i would do it on a lighter image in the future, as it would highlight the effect more.
I created this image by firstly creating a new adjustment layer for curves, then name your layer, after this you must drag the curve down over exaggerating it, as shown below:
You must ensure the squares at the top are black and white, as seen below:
then click on the gradient tool, and select 'gradient', next click on the radial button:
and then drag out from the centre of the photograph, to create the vignette.
I edited this image using the white balance effect. I selected the white background and it then transformed the image from warmer oranges to harsher blues. The image on the left is the original, whereas the image on the right is the edited one. I believe the edited image appears better than the non-edited one as it looks almost HD due to the whiter, brighter background.
I edited this image using the spot healing brush tool. I applied it on the facial region, around the forehead and cheek area. This shows a slight difference and makes the skin appear smoother and more glowing, despite this there's not that much of a difference when zoomed out of the image.
You can achieve this affect by selecting the 'healing tool' on the left hand column of the screen, you then click the areas you wish to change. You can change the brush size, and density at the top of the screen.
The image on the right is edited, whereas the image on the left is the original. I used the brightness sand contrast tool to initially up the brightness of the image, then i used sensitive colour to edit the blues in the image. This creates a cool, crisp view overall. I prefer the image on the right (the edited one) as it creates a cleaner image overall.
The brightness/contrast tool is on the right hand side of the page, you alter this by using the sliders. The sensitive colour tool is also located in the same place, and you select which colour you want to change and enhance this. To achieve the white balance effect, first you must click on the levels button the the right hand side of the screen, as shown below:
The brightness/contrast tool is on the right hand side of the page, you alter this by using the sliders. The sensitive colour tool is also located in the same place, and you select which colour you want to change and enhance this. To achieve the white balance effect, first you must click on the levels button the the right hand side of the screen, as shown below:
next click on the part you wish to balance, and it will change the colour for you.
The image on the left is the edited one, whereas the one on the right is the original photograph. I believe by editing the image it has made it worse. I used the dodge tool to lighten the face, and the burn tool to darken the top and jacket. I believes it looks worse as due to the different colours on the face, it appears as though the face has darker and lighter patches. Despite this i do prefer using the burn tool on the top and jacket as it highlights the detail and shadows.
To used the dodge tool, you select it on the left hand side of the page. You then click on the parts you wish to lighten. You can change the brush size, and density at the top of the page also.
To used the dodge tool, you select it on the left hand side of the page. You then click on the parts you wish to lighten. You can change the brush size, and density at the top of the page also.
The image on the right is the edited one, whereas the image on the left is the original image. I prefer the edited image as it exposes more tone and saturation, which makes the image more interesting. The screen shots adjacent show which settings i had the filters on the image on.
This is an image I photographed, and then edited into black and white. I believe the black and white effect allows the detail of the bricks to stand out more. Overall I like the image as a whole, as you can also see the shadow casted.
To achieve this affect you select the 'black and white' tool which is located on the right hand side of the photoshop page. You can then edit the different colours in the image, using the sliders, which change how dark/light some areas are.


No comments:
Post a Comment